How to make AI Art that STANDS OUT (No Experience Needed)
by
/
If you make a purchase after clicking links on our site, we may earn a small affiliate commission – read more here >
Gone are the days when eye-catching images required superhuman creative skills.
It’s super simple. You don’t even need to pay for any tools to get started.
And I’ll reveal every trick in the book to make your AI art pop.
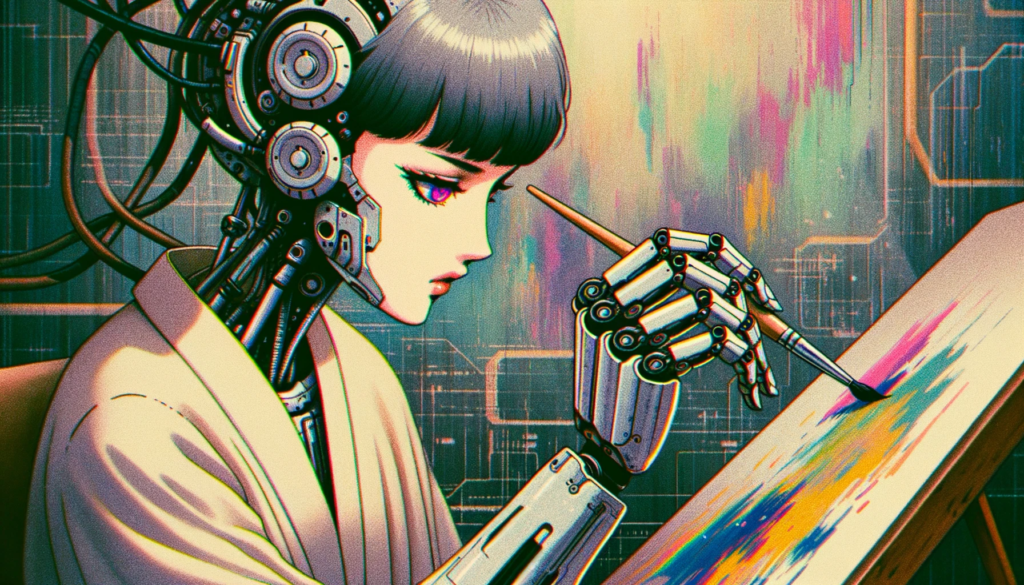
So, what exactly are AI art generators?
Think of them as your digital art assistants. They use advanced algorithms to turn text prompts into stunning images.
How do they work?
You feed an AI art generator a text prompt—something as simple as “a peaceful lake at sunset” or completely imaginative as “a bio-mechanical hippo jumping into a pool filled with binary code.” The AI takes this cue and whips up an image matching your description.
Why use them?
AI art generators are leveling the playing field, making it possible for anyone to bring their idea to life. They’re like a shortcut to getting professional images for your social media, marketing campaign, or any platform requiring captivating visuals.
Benefits of Using AI to Create Art
The main benefit of using AI to create art is accessibility. Anyone can visually express their creativity – without requiring unique talents or technical knowledge.
Here are 4 additional advantages of using AI to make images:
- Efficiency: A major benefit of making art with AI is speed, allowing you to create stunning images in a fraction of the time it takes by hand.
- Unleashed Creativity: Ever felt boxed in by your own artistic capabilities? Generating art with AI frees you from any skill constraints. You essentially collaborate with AI and get stunning images by guiding it with your creative vision.
- Brainstorming: Want to brainstorm design concepts for a new product? Or maybe you’re looking to experiment with different styles. AI art isn’t just about making images. It’s a sandbox for creative experimentation.
- Exploration: AI allows you to explore and learn without the fear of wasting too much time or materials. You can try out wild new concepts and learn from the process, growing your skills along the way.
What is AI Art used for?
AI art can be used in various areas beyond personal artistic expression:
- Social Media: Content creators can captivate their audience by using AI art to create posts that stand out.
- Concept Art and Illustration Dream up the first visuals for games, movies, and more. Perfect for sparking ideas in any creative project.
- Marketing: Make eye-catching graphics for you ad campaigns. AI is fantastic for designing graphics that stand out.
- Web & App Design Create inviting icons and graphics to elevate your digital presence.
- Fashion: Experiment with new design ideas and tweak existing ones. AI is your go-to for innovative patterns and styles.
- Education: Bring complex ideas to life. AI makes learning visually engaging and simpler to understand.
- Entertainment and Media Create captivating visuals for games, movies, and interactive experiences.
- Prototyping: Quickly explore and visualize design options. AI speeds up the journey from concept to prototype.
As AI technology evolves, expect the capabilities and applications of AI art generators to expand exponentially.
How to Choose the Right Tool to Start Making AI Art
So, you’re excited about jumping into the world of AI art, but you’re scratching your head over which image generator to choose?
These tools can be complicated, too costly for beginners, and might have poor quality.
But I’ve got you covered with this quick overview so you can start creating AI Art ASAP:
Beginner: If you are new to making AI art and want to start without subscribing to expensive tools, I recommend using Leonardo or Bing Image Creator. They are both free and can create quality images without complex prompts.
Intermediary: MidJourney and OpenAI’s Dall-E 3 are powerful and reliable AI Art Generators. Both tools are excellent for generating stunning visuals and offer methods to fine-tune your creations further. You can only access these tools with a monthly subscription, but there well worth it when you’re serious about creating amazing AI images. The downside are their strict community guidelines, which limit creative freedom.
Professional: For advanced AI art generation, Stable Diffusion offers the most customizable experience, but also has the highest learning curve and is resource-extensive. Their model is open-source and can run locally on your computer with user interfaces such as ComfyUi. Here’s a helpful guide on how to use Stable Diffusion locally on your computer.
Overall, the right tool to start creating AI art depends on your expectations and goals. To learn more, check out our review of the best AI image tools and their capabilities.
How to Write Prompts to Make Better AI Art
Think of AI art prompts as the description of your image. It allows the AI to see what’s in your imagination. Think of it as telling a story, the more details you provide, the clearer the picture gets. But keep it short and to the point since too much information results in the AI art tool to ignore parts of your prompt.
The perfect method for prompting vary slightly depending on the tool you use.
Dall-E 3, for example, works with a natural, more conversational approach when prompting. You say what you want by describing the image you have in your head like you would tell a friend.
Most other AI Image Generators, like MidJourney or Stable Diffusion, are not optimized to interpret natural language. They see each word as an individual token that directs the output.
Example: An illustration of a colorful rooster standing on top of a black and white cow. The cow seems unbothered and continues grazing.
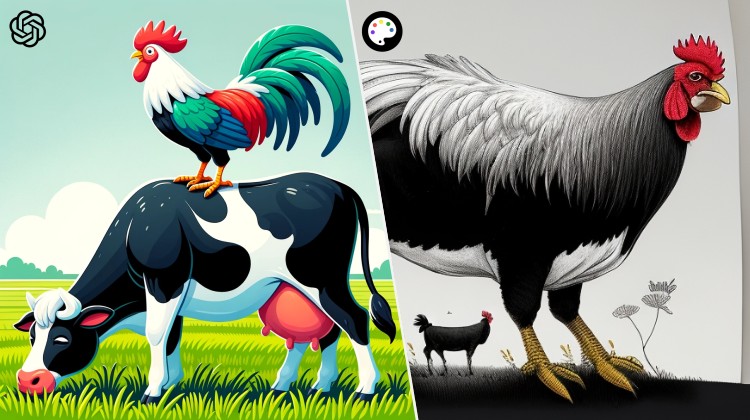
Dall-E created an accurate representation of what I was describing in my prompt.
Stable Diffusion took my prompt and turned it into nightmare material, not following my prompt in any way. You can see how the model recognized „rooster“ and „cow“ and just merged them into one.
How to make AI Art Prompts for Striking Images in 6 Simple Steps:
Step 1: Identify Your Subject
Start with a strong, specific subject. Are you looking for a robot or a cyborg? The more specific you are, the better.
Step 2: Describe Your Subject
Once you’ve got your subject, add a few words of description. Aim for rich visual descriptions. For example, instead of saying “a cyborg,” you could say “a female cyborg with pink hair.”
Step 3: Add Context
After you have a clear picture of how your subject should look, you can add an additional context to breathe more life into your creation. Describe an action that is taking place. Do you want to have your character pose for a portrait or eat a sandwich?
Step 4: Background and Atmosphere
What’s happening around your subject? Is it a sunny day on the beach or a stormy night on a mountain? Should the image be joyful or daunting? This sets the vibe of your image.
Step 5: Use Sensory Language
Engage all senses. Describe the lighting, colors, and textures.
Your image could have dramatic lighting or soft lighting.
Be bright and colorful or have a vintage look using muted colors and rough textures.
Step 6: Add Style
Do you want your art to be a realistic photograph or an anime illustration? You can even use artists’ names to recreate a style you want. For example, saying “Van Gogh” immediately tells the AI the kind of brushwork and color you’re interested in.
*Some AI tools do not allow you to reference current artists because of copyright issues. For example, Dall-E only recreates the work of famous artists before 1912.
And keep in mind that every AI art generator has its distinct style, shaped by its training data. Some can mimic specific art styles, while others can’t because they weren’t trained on that information.
Here’s a simple prompt framework to help you get started making AI art:
[subject description] + [context/action], [background], [lighting/colors/textures], in the style of [art style]
*You can also begin your prompt with the art style in mind – either way is fine.
The fun part of using AI to make art is exploring new ideas. And the first prompt is a just starting point. Add or remove keywords until you get the result you’re looking for.
Simple Inspiration Prompts to create AI art (made with Bing Create)
Prompting to make AI Art is like learning a new language. The more practice, the better you become. Here’s are some simple prompts to inspire your next AI generated images:
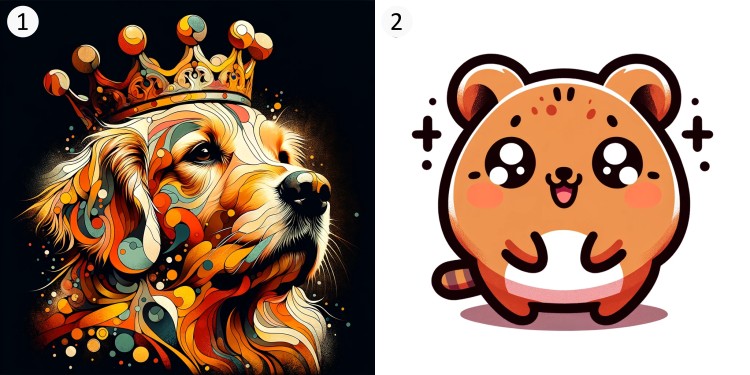
- Abstract portrait of a golden retriever wearing a crown, warm colors, Eclectic art style
- kawaii clip-art quokka, flat colors, bold outlines, white background
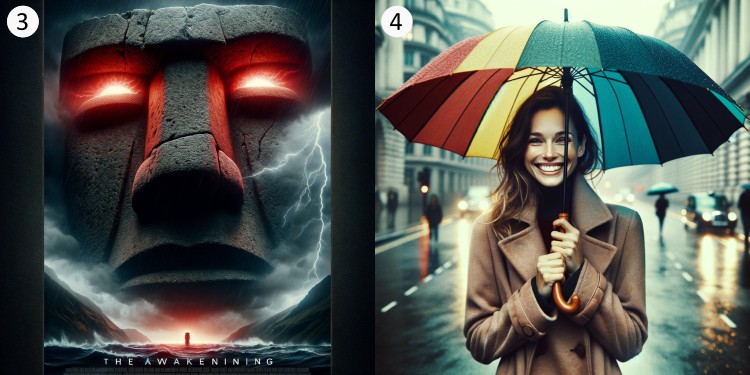
- movie poster called „The Awakening“ about a Moai with red glowing eyes, thunderstorm, daunting, apocalyptic, cinematic lighting
- High-resolution photograph of a smiling woman holding a colorful umbrella, rainy day in London, dramatic lighting, resembling a photo taken on a digital camera.
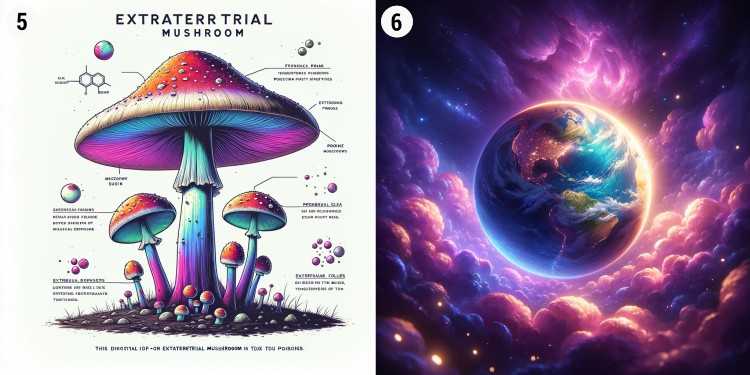
- Anatomical illustration of a poisonous alien mushroom, vibrant colors, diagram description, white background
- tiny planet art of earth, ambient lighting, purple nebula, animated-style
Check out the best AI Art prompts for more inspiration!
How to Edit and Enhance AI-Generated Images
You can further edit and enhance your creation to turn your AI-generated image into a real work of art.
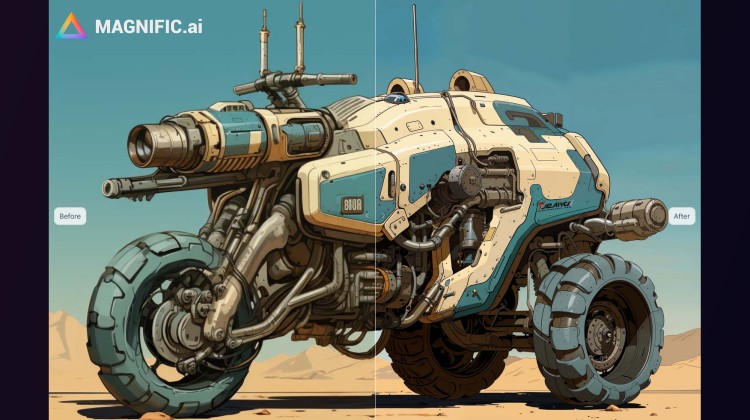
Upscale your AI art
1. AI-generated images often lack attention to detail, which creates low-quality or blurry areas. Magnific.ai offers a great solution. Their upscaling software uses artificial intelligence to turn your image into a higher-resolution version, adding details to give it a crisp look.
2. Most AI Art Generators only generate small image files, which might not be enough for your project. Try this free AI image upscaler: Upscayl
3. Need to turn your image into a Vector Graphic for unlimited scalability? Try this AI Image vectorizer.
Step-by-Step Approach
AI Art generators often struggle with complex scenes. If you need a combination of characters or a detailed subject and vivid background, try generating them individually and later assemble them with your favorite image editing software.
Remove the background
If you need to isolate your subject from the background and create a PNG, try Clipdrop. For better results, add ‘greenscreen background ‘ to your image prompt.
Further optimizations
Subtle tweaks can lead to dramatic changes. You can further modify your AI art with classic image editing software like Photoshop, or free alternatives like Photopea and Canva. You can enhance the colors by adjusting the saturation or add grain to make your image feel vintage.
Conclusion
Using AI is becoming a common practice for making art. These tools are changing how we express our creativity, allowing anyone to participate in art without ever lifting a brush.
Dive in, start creating, and who knows? The next masterpiece could very well be a product of your imagination, aided by a little bit of artificial intelligence.
FAQ
Unlock more AI insights
